biz.dfch.AsdSte100Mcp








An MCP server for the ASD-STE100 (Simplified Technical English) Issue 9 standard.
ASD-STE100: Copyright by (c) ASD.
I am in no way affiliated with ASD. ASD does not endorse my work.
Table of Contents
- Tools
- Resources
- Installation
- Usage
- Authentication
- Add to OpenCode
- Development
- Related Projects
- Make a Release
- License
Authentication
This server exposes only read-only lookup tools and resources over
vocabulary and rules data that is bundled with the package; there is
nothing to authenticate against. No API keys, tokens, or credentials are
required or supported in either stdio or sse transport mode. If you
expose the sse transport beyond localhost, secure it at the network
layer (e.g. a reverse proxy) rather than expecting the server to
authenticate requests itself.
Tools
Vocabulary
| Tool | Description |
|---|---|
word_find | Search for a term by exact name (case-insensitive) in the ASD-STE100 Issue 9 vocabulary. Return approved/rejected status, part of speech, STE examples, and approved alternatives. Use this first when you know the exact word. Use word_match with a wildcard if this tool returns no items. |
word_find_many | Search for multiple terms by exact name (case-insensitive) in a single call. Returns one WordFindEntry per input term (term + results), in the same order as the input, each holding 0, 1, or more matching vocabulary entries. |
word_match | Search the vocabulary using a regular expression pattern. Return all entries whose term matches. Use it to find all words with a common prefix or pattern (e.g. ^de or .*tion$). Paginated (max_results/offset); returns a WordResult. |
word_fuzzy | Search for a term with sequence-matching (Python difflib.get_close_matches). Results may not be obvious — use when word_find returns nothing and you want fuzzy suggestions. |
word_list | Return all vocabulary entries. Only use when you need to process the full vocabulary. Use word_count instead if you only need the total. Paginated (max_results/offset); returns a WordResult. |
word_count | Return the total number of entries in the vocabulary. Use instead of word_list when you only need the count. |
word_synonym | Search for vocabulary entries that are WordNet synonyms of a word, via the biz-dfch-asdste100nlp library's Nlp class. Use this to find approved alternatives for a non-STE word. |
Rules
| Tool | Description |
|---|---|
rules_find | Search for rules in the ruleset by exact id (case-insensitive), e.g. R1.1 or GR-8. Use this first when you know the exact id. |
rules_match | Search rules using a regular expression matched against the rule name and summary. |
rules_search | Full-text search across every text a rule carries (section, category, name, summary, and all content blocks: text, notes, examples, technical noun/verb lists). Optionally restrict to specific content types. Paginated (max_results/offset); returns a SearchResult. |
rules_by_section | Search for rules by exact section name (case-insensitive), e.g. Words. |
rules_by_category | Search for rules by exact category name (case-insensitive), e.g. Technical nouns. |
rules_examples | Return content items across rules, optionally scoped by id/section/category and filtered by content type. Paginated (max_results/offset); returns a RulesExamplesResult. |
rules_overview | Return a lightweight, per-rule overview (id, type, section, category, name, optional summary, and content counts/flags) without shipping every content item. |
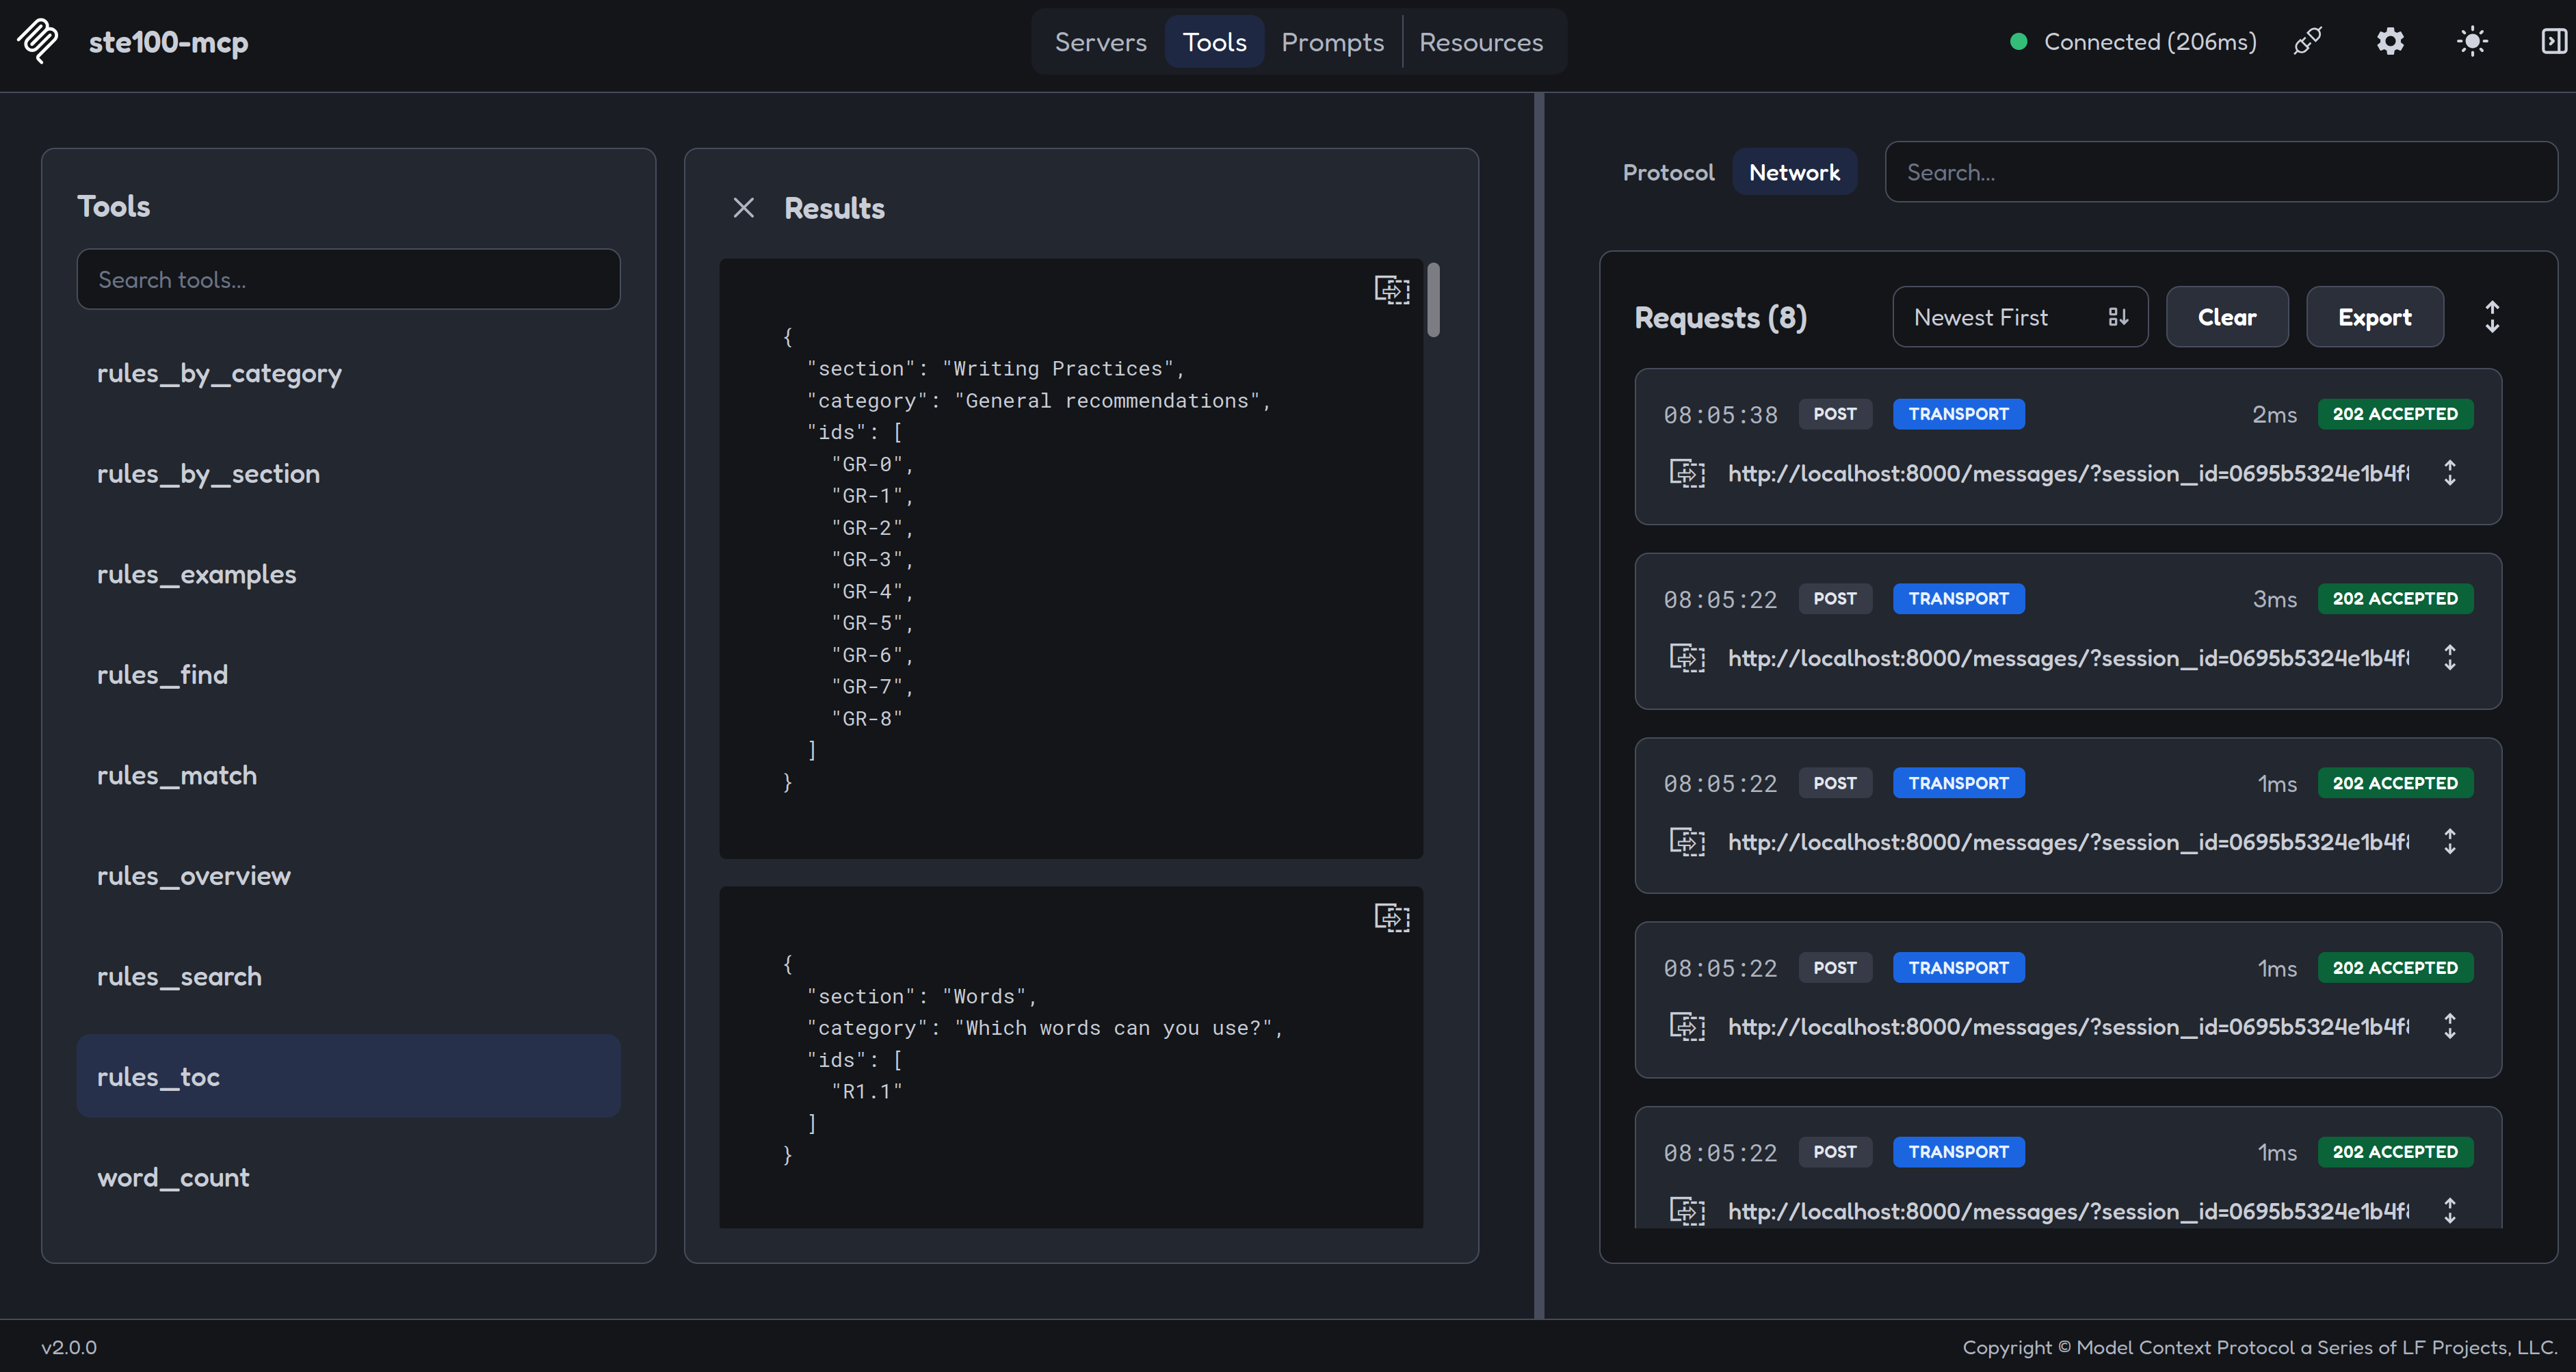
rules_toc | Return the distinct (section, category) pairs as a table-of-contents outline, optionally scoped to one section. |
Resources
Read-only resources let a client browse or attach ruleset data directly (e.g. via an "@mention" or resource picker), without going through a tool call.
| Resource URI | Description |
|---|---|
asdste100://rules/toc | Table-of-contents outline of the ruleset: the distinct (section, category) pairs, each with the ids they contain. Mirrors the rules_toc tool with no section filter. |
asdste100://rules/rule/{id_} | A single rule/recommendation/information item by exact id (case-insensitive), e.g. asdste100://rules/rule/R1.1. Mirrors the rules_find tool; an unknown id resolves to an empty list rather than an error. |
asdste100://version | Installed version numbers of the MCP server itself and its three data-backing libraries: biz-dfch-asdste100vocab, biz-dfch-asdste100rules, and biz-dfch-asdste100nlp. |
Installation
pip install biz-dfch-asdste100mcp
Or with uv:
uv add biz-dfch-asdste100mcp
Usage
MCP Inspector
If you want to test the MCP server without a tool like OpenCode, you can do this with MCP Inspector.
MCP Inspector is part of the mcp[cli] package. When you install this project with --extra dev you can use MCP Inspector.
NOTE: The examples below use bunx instead of npx to launch MCP Inspector; npx has not been tested.
stdio (Claude Desktop, OpenCode, and other MCP hosts)
asdste100-mcp
Run MCP Inspector against the server over stdio:
bunx @modelcontextprotocol/inspector uv run --frozen --directory . asdste100-mcp
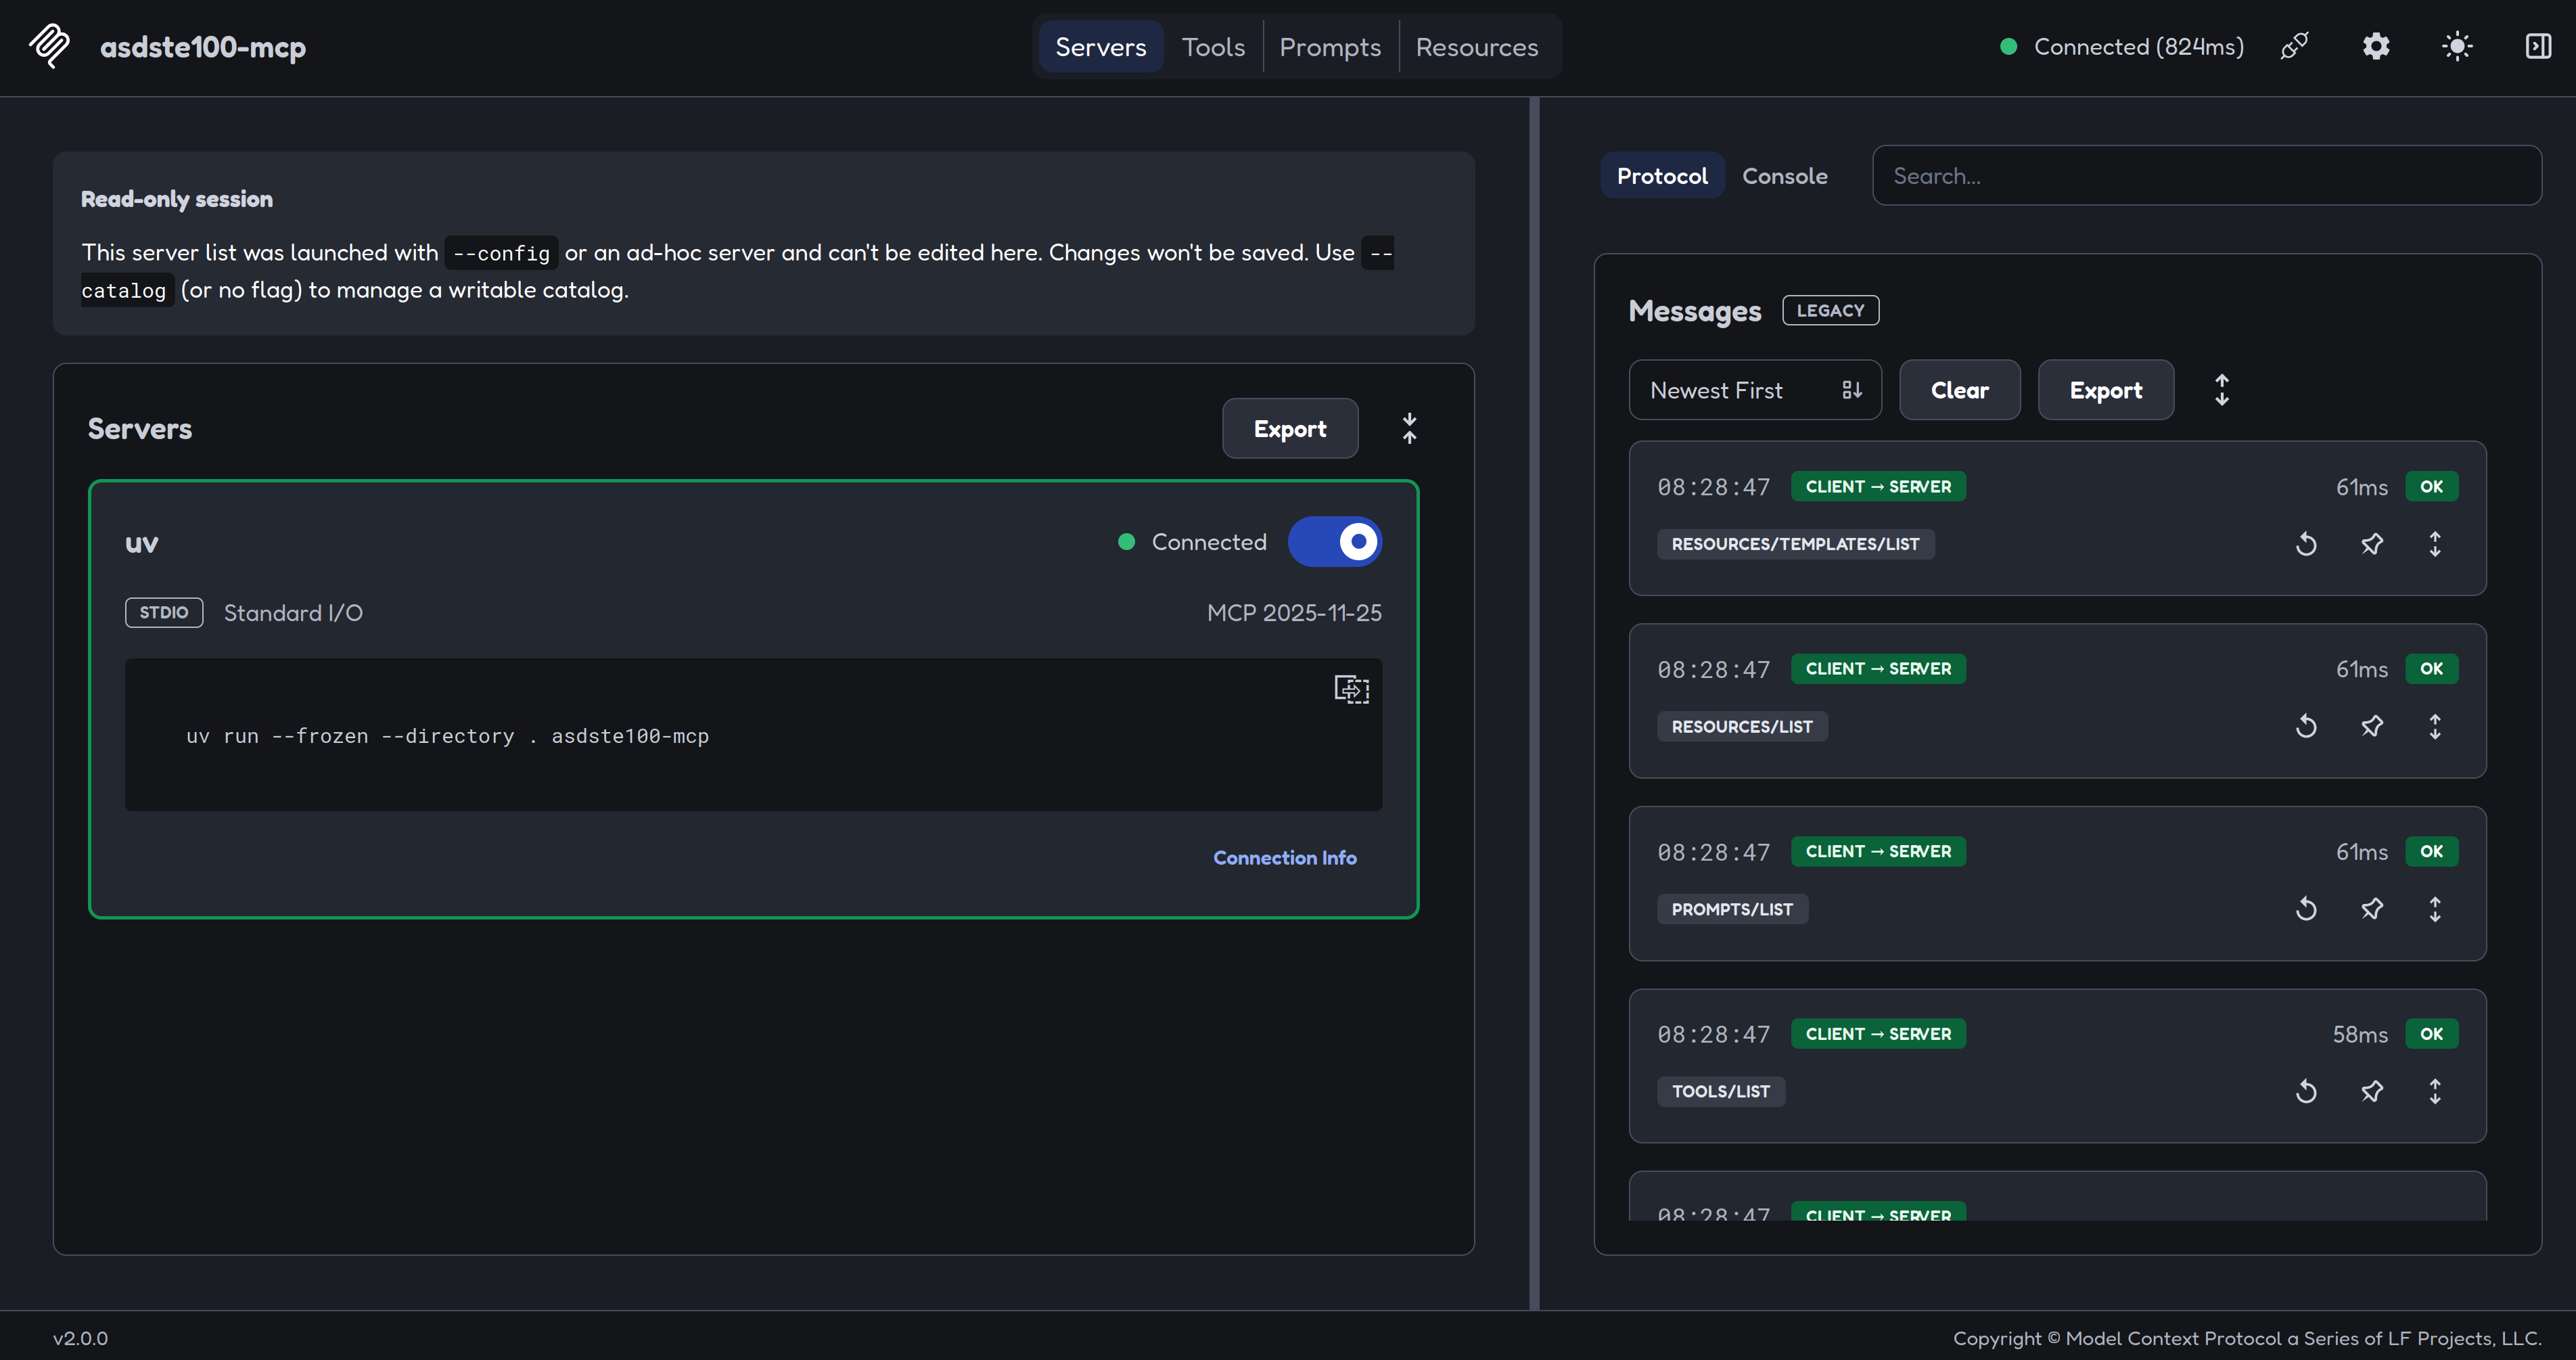
NOTE: Sometimes, the MCP Inspector cannot connect to the MCP server via stdio. Use the sse option (see below) instead.
SSE / network
asdste100-mcp --transport sse --host localhost --port 8000
NOTE: You do not have to supply the option --port to the MCP server. The default value of port is 8000.
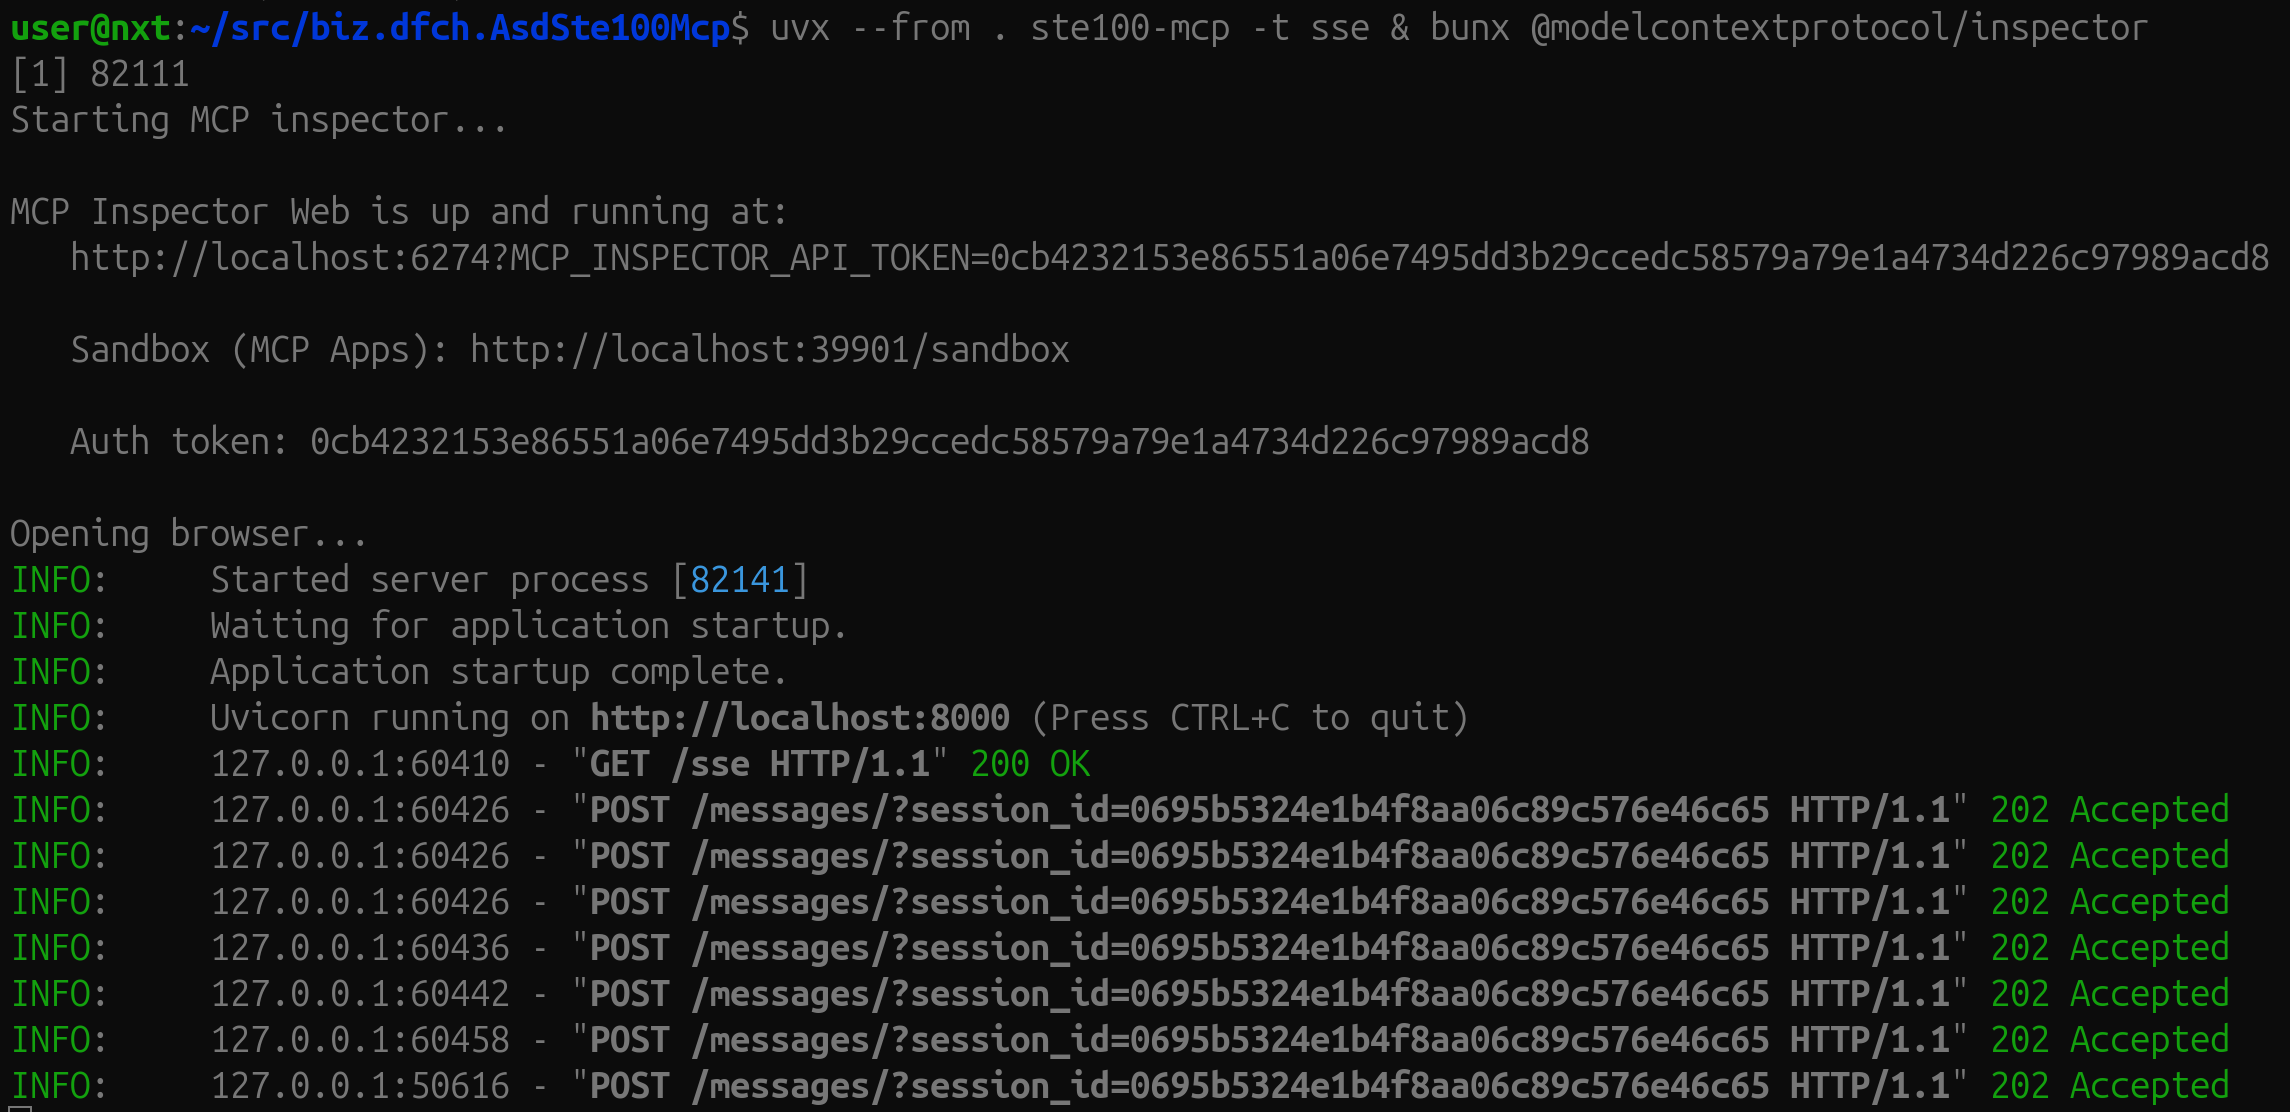
Start the server, then connect MCP Inspector to it — these are two separate commands, run in two separate terminals:
# terminal 1: start the server
uvx --from . asdste100-mcp -t sse
# terminal 2: launch the inspector and connect it to the running server
bunx @modelcontextprotocol/inspector
Options
| Option | Env var | Default | Description |
|---|---|---|---|
--transport | ASDSTE100_MCP_TRANSPORT | stdio | Transport mode: stdio or sse |
--host | ASDSTE100_MCP_HOST | localhost | Bind address (SSE only) |
--port | ASDSTE100_MCP_PORT | 8000 | TCP port (SSE only) |
--env | — | auto-discovered | Path to a .env file |
--file / -f | ASDSTE100_MCP_FILES | (empty) | Path to a vocabulary file (*.jsonl); repeatable |
--rules-file / -r | ASDSTE100_MCP_RULES_FILES | (empty) | Path to a rules file (a single JSON array); repeatable |
Vocabulary configuration
| Env var | Default | Description |
|---|---|---|
ASDSTE100_MCP_FILES | (empty) | Colon-separated paths to additional vocabulary files |
ASDSTE100_MCP_USE_STE100 | true | Load the built-in ASD-STE100 Issue 9 vocabulary |
ASDSTE100_MCP_USE_STE100_TECHNICAL_WORDS | false | Also load the technical words vocabulary |
Rules configuration
| Env var | Default | Description |
|---|---|---|
ASDSTE100_MCP_RULES_FILES | (empty) | Colon-separated paths to additional rules files (each a single JSON array) |
ASDSTE100_MCP_USE_STE100_RULES | true | Load the built-in ASD-STE100 Issue 9 ruleset |
Add to OpenCode
To add the ASD-STE100 (Simplified Technical English) MCP server to your OpenCode configuration:
-
Open your OpenCode config file (typically
~/.config/opencode/opencode.jsonor~/.config/opencode/opencode.jsonc) -
Add the following configuration to the
mcpsection (and use it viastdio):
"asdste100": {
  "type": "local",
  "enabled": true,
  "command": ["uvx", "--from", "biz-dfch-asdste100mcp", "asdste100-mcp"]
}
- Save the file and restart OpenCode
This enables OpenCode to access ASD-STE100 vocabulary and rules lookups for technical writing and documentation compliance.
Development
Install dev dependencies
uv sync --all-extras
Run linters
uv run --frozen ruff format --check
uv run --frozen ruff check
uv run --frozen pylint $(git ls-files '*.py')
Run tests
uv run --frozen python -m unittest discover -v -s tests -t . -p "test_*.py"
Related Projects
This server is part of the ASD-STE100 tooling family:
- biz.dfch.AsdSte100Vocab — the ASD-STE100 Issue 9 vocabulary library
- biz.dfch.AsdSte100Rules — the ASD-STE100 Issue 9 ruleset library
- biz.dfch.AsdSte100Nlp — WordNet-based synonym lookup for ASD-STE100 words
- biz.dfch.AsdSte100Lookup — an interactive CLI to look up words and rules
- biz.dfch.AsdSte100Mcp — this repo: an MCP server exposing vocabulary and rules lookup tools
Make a Release
1. Make sure all tests pass
Before releasing, make sure the CI pipeline is green on the dev branch:
uv run --frozen ruff format --check
uv run --frozen ruff check
uv run --frozen pylint $(git ls-files '*.py')
uv run --frozen python -m unittest discover -v -s tests -t . -p "test_*.py"
2. Increase the version
Update the version in pyproject.toml:
version = "x.y.z"
3. Commit and push to dev
git add pyproject.toml CHANGELOG.md
git commit -m "chore: bump version to vx.y.z"
git push origin dev
4. Merge dev into main
git checkout main
git merge dev
git push origin main
5. Create and push a version tag
export VERSION=x.y.z
git tag v${VERSION}
git push origin v${VERSION}
Pushing the tag triggers the publish.yml workflow, which will:
- Build the sdist and wheel.
- Publish to TestPyPI (environment
testpypi). - Publish to PyPI (environment
pypi), only if TestPyPI succeeded. - Publish to the MCP Registry (
publish-to-mcp-registryjob) — requires the new version to be live on PyPI first. - Create a GitHub Release with auto-generated notes and the distribution artifacts attached.
Then switch back to dev to continue work:
git checkout dev
Configure Trusted Publishing
The workflow uses OIDC Trusted Publishing — no API tokens or secrets are needed.
GitHub: create environments
Go to your repo → Settings → Environments and create two environments:
| Environment | Recommended protection |
|---|---|
testpypi | None required |
pypi | Add a required reviewer to prevent accidental production releases |
TestPyPI
Log in at test.pypi.org → Your account → Publishing → Add a new pending publisher:
| Field | Value |
|---|---|
| PyPI project name | biz-dfch-asdste100mcp |
| Owner | dfch |
| Repository | biz.dfch.AsdSte100Mcp |
| Workflow name | publish.yml |
| Environment | testpypi |
PyPI
Log in at pypi.org → Your account → Publishing → Add a new pending publisher:
| Field | Value |
|---|---|
| PyPI project name | biz-dfch-asdste100mcp |
| Owner | dfch |
| Repository | biz.dfch.AsdSte100Mcp |
| Workflow name | publish.yml |
| Environment | pypi |
MCP Registry Publishing
The publish-to-mcp-registry job uses GitHub OIDC authentication and does not require additional setup — it will automatically publish to the official MCP Registry once the package is live on PyPI.
Verify your server is registered:
curl "https://registry.modelcontextprotocol.io/v0.1/servers?search=io.github.dfch/biz-dfch-asdste100mcp"